Set AdminWeb to port 443
If you upgrade your ZervicePoint version, you need to do this change once again.
IIS
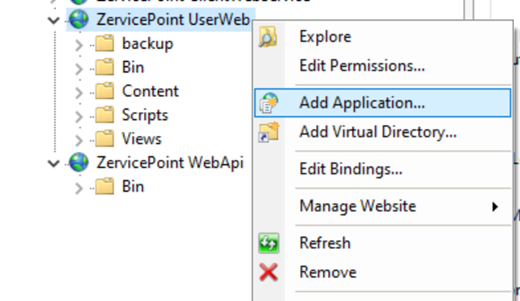
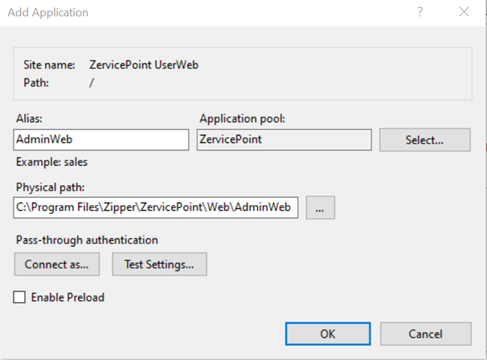
Go to your IIS and add an application under ZervicePoint UserWeb
Alias: AdminWeb
Application pool: ZervicePoint (or the same as the other ZervicePoint sites uses)
Physical Path: “C:\Program Files\Zipper\ZervicePoint\Web\AdminWeb” (Should point at the same files as your current ZervicePoint AdminWeb)
Webconfig
Go to your file locations of the ZervicePoint UserWeb (You can find this in iis under basic settings of the ZervicePoint Userweb ) Exampel: “C:\Program Files\Zipper\ZervicePoint\Web\UserWeb” Take a backup of your “Web.config” just in case.
Then open PowerShell as administrator and run the script below. It will update your web.config with the changes needed for this to work.
Before running the script you need you check that the path is correct, it should point to the path of your web.config.
Scipt
$xml = New-Object XML
#Edit path here
$xml.Load("C:\Program Files\Zipper\ZervicePoint\Web\UserWeb\Web.config")

$systemWebNode = $xml.configuration.SelectSingleNode("system.web")
$locationNode = $xml.CreateNode("element","location","")
$locationNode.SetAttribute("path",".")
$locationNode.SetAttribute("inheritInChildApplications","false")
$locationNode.AppendChild($systemWebNode)
$xml.configuration.AppendChild($locationNode)

$systemWebserverNode = $xml.configuration.SelectSingleNode("system.webServer")
$locationNode = $xml.CreateNode("element","location","")
$locationNode.SetAttribute("path",".")
$locationNode.SetAttribute("inheritInChildApplications","false")
$locationNode.AppendChild($systemWebserverNode)
$xml.configuration.AppendChild($locationNode)

$systemidentityModelNode = $xml.configuration.SelectSingleNode("system.identityModel")
$locationNode = $xml.CreateNode("element","location","")
$locationNode.SetAttribute("path",".")
$locationNode.SetAttribute("inheritInChildApplications","false")
$locationNode.AppendChild($systemidentityModelNode)
$xml.configuration.AppendChild($locationNode)

$entityFrameworkNode = $xml.configuration.SelectSingleNode("entityFramework")
$locationNode = $xml.CreateNode("element","location","")
$locationNode.SetAttribute("path",".")
$locationNode.SetAttribute("inheritInChildApplications","false")
$locationNode.AppendChild($entityFrameworkNode)
$xml.configuration.AppendChild($locationNode)

#Edit path here
$xml.Save("C:\Program Files\Zipper\ZervicePoint\Web\UserWeb\Web.config")
What the script does:
It adds some lines to the webconfig file.
Add
<location path="." inheritInChildApplications="false">
Before the tags:
<system.identityModel>, <entityFramework>, <system.web>, <system.webServer>
Then close with
</location> After each closing tag like “</system.identityModel>”
SQL
Go to your SQL database.
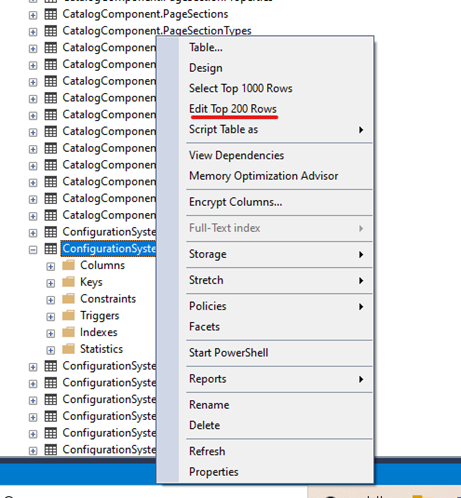
Database -> ZervicePoint ->Tables -> ConfigurationSystem.GlobalSetting.
Right click “Edit top 200 Rows”
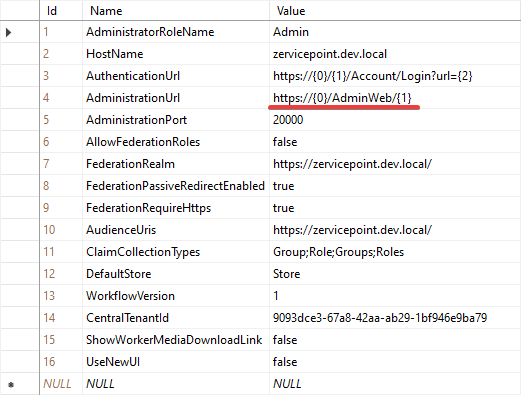
Edit the Row “AdministrationUrl”
It should be https://{0}/AdminWeb/{1}
Then save and close SQL
Configuring IIS Machine Key
To maintain authentication continuity between UserWeb and AdminWeb. You have to set an IIS Machine Key.
Implementing the Machine Key Configuration
- Open IIS Manager: Launch the Internet Information Services (IIS) Manager on your server.
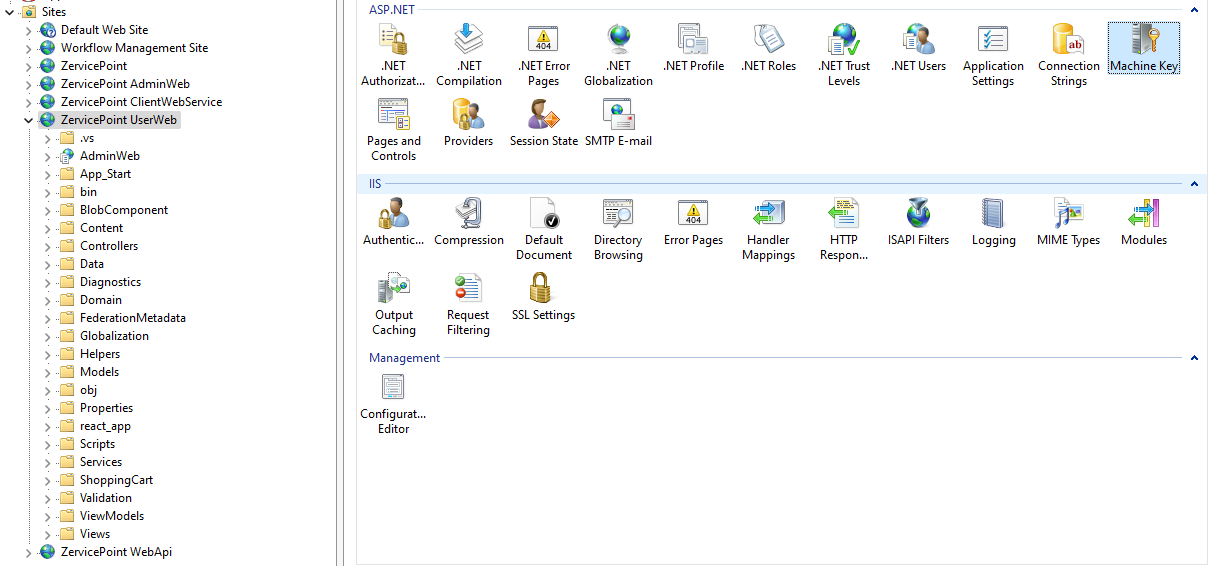
- Locate Your Application: Within the "Sites" section, find the ZervicePoint UserWeb.
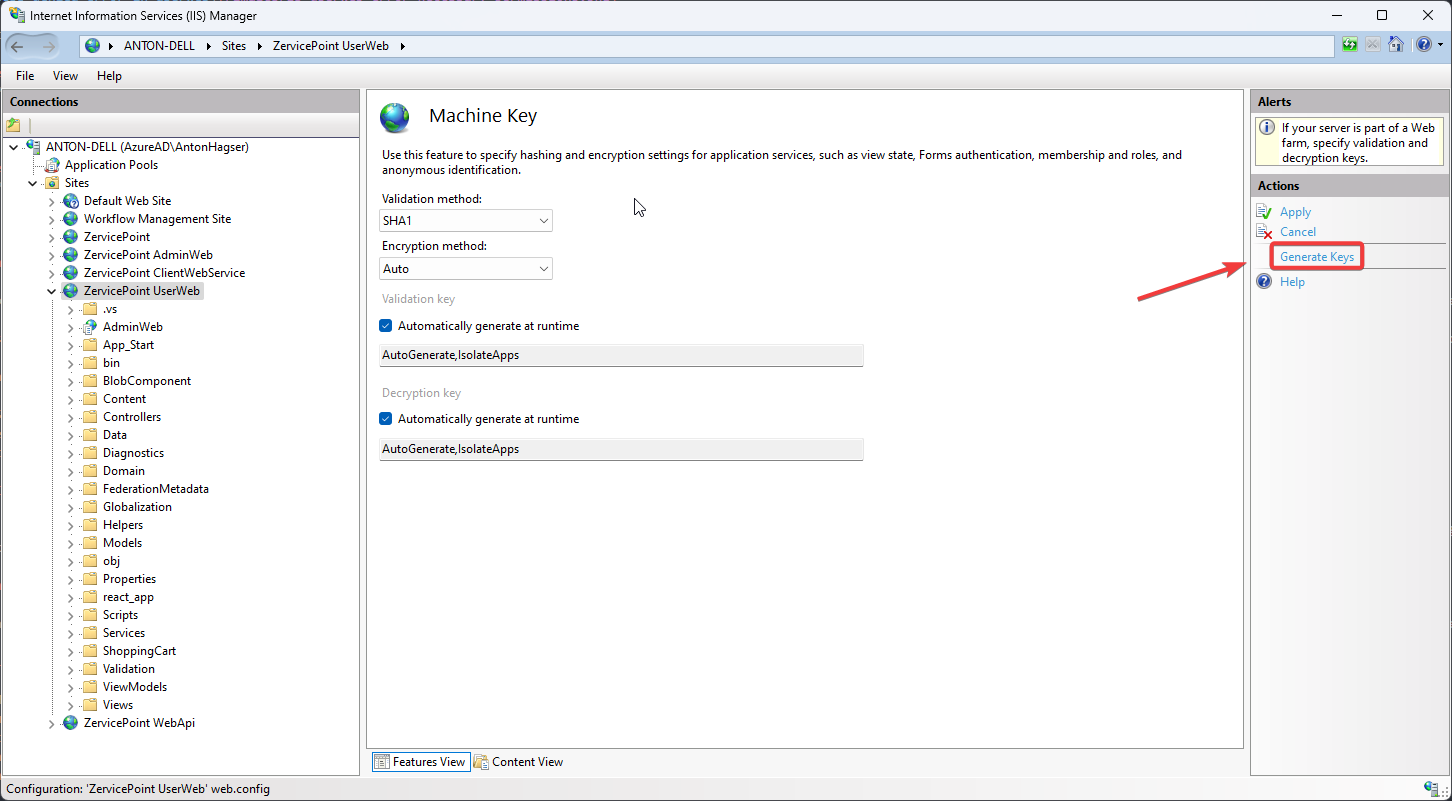
- Access Machine Key Settings: Go to the application's settings and select the "Machine Key" option, usually found under the "ASP.NET" section.
- Generate and Apply a New Machine Key: Use the IIS Manager to create a new validation and decryption key. Apply this key to your application to finalize the setup.
Last Step
Open Powershell as Administrator and write “iisreset”