Single Server Setup - Single Store
This guide describes steps required for installing zervicepoint on a single-server setup. This setup will use a "standard" setup and use a service account for frontend and one for backend.
Follow this guide from top to bottom, note that there are steps where you should save/remember the output. So be prepared to take some notes. (e.g Appid, secret)
Note
It will not cover deployment and setup of AD, CA, MS SQL Server, ADFS/AzureAD, request/import web certificate or DNS.
Requirements
Ensure you have the following available.
- Application server (Where zervicepoint will be installed) is joined to active directory domain.
- Microsoft SQL Server (SQL Express supported for non-production scenarios)
- Azure AD Tenant (and permissions to register a new application)
- DNS
- Web Certificate
DNS
A DNS record should be created that matches the intended hostname for zervicepoint and should point to the server.
| Type | Name |
|---|---|
| A/CNAME | selfservice.example.com |
Certificate
A web certificate is required and must match the DNS entry for zervicepoint. Wildcard certificates are supported.
| Name |
|---|
| selfservice.example.com |
Service Accounts
This section explains the purpose of the service account for zervicepoint and as well the required permissions for a single-server/store setup.
Frontend Account
The frontend account runs the application pools for Zervicepoint.
- User Web
- Admin Web
- Process System Web
- Client Web Service
- ZP Web Api
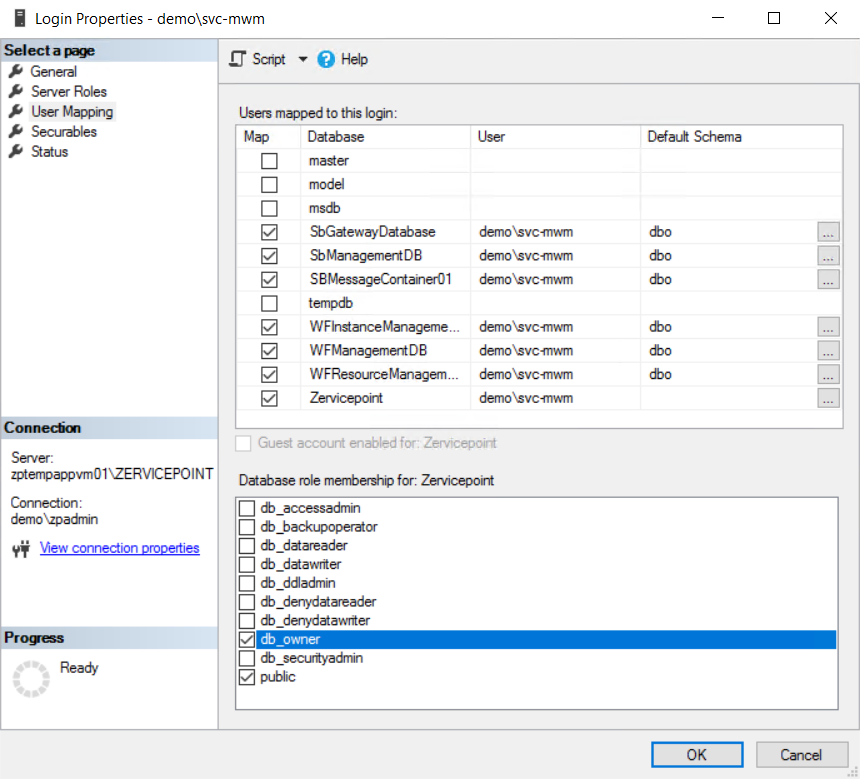
Frontend account permissions
- Assigned to db_owner role on Zervicepoint database.
- Manage user for Zervicepoint SB Namespace. Servicebus Zervicepoint namespace access
Local Administrator or:
- Need read access to the private key of the Client Web Service Token Signing Certificate. Read access to certificates
- Need read access to the private key of the Client Web Service Data Signing Certificate. Read access to certificates
Backend Account
The backend account runs the following services for Zervicepoint.
- ProcessSystem service
- ProvisioningSystem service
- ProvisioningSystemInventory service
Backend account permissions
- Logon on as a service.
- Assigned to db_owner role on Zervicepoint database.
- Manage user for Zervicepoint SB Namespace. Servicebus Zervicepoint namespace access
Local Administrator or:
- Member of the Workflow Manager Admin group (default set to BUILTIN\Administrators group)
Workflow Manager Account
Workflow Manager account that runs the Service Bus / Workflow Manager services.
Workflow Manager account permissions
- Logon on as a service.
- Assigned to db_owner role on Zervicepoint database.
- Manage user for Zervicepoint SB Namespace. Servicebus Zervicepoint namespace access
Note
This account should already be created as Service Bus/Workflow Manager should be installed prior to installing zervicepoint, but often the DB_owner permission will be missing unless the zervicepoint database is pre-created as an empty database.
Create Service Accounts
Create two service account for zervicepoint to run the application pool and services. Make sure you take note which account should be used as frontend or backend.
Import-Module ActiveDirectory
New-ADUser -Name '<username>' -SamAccountName '<username>' -Description "Workflow Manager Service Account" -PasswordNeverExpires:$true -AccountPassword (ConvertTo-SecureString -String "Passw0rd1" -AsPlainText -Force) -Enabled:$true
Service Account Permissions
- Local Administrator on application server.
- Assigned to db_owner role on Zervicepoint database.
- ManageUser on Servicebus Zervicepoint namespace
# On Application Server
Add-LocalGroupMember -Group administrators -Member '<domain>\<backend account>'
Add-LocalGroupMember -Group administrators -Member '<domain>\<frontend account>'
Assign db_owner role on zervicepoint database
As the database is not yet created, you can either choose to pre-create the database and assign the permissions or apply them after the installation.
Info
If permissions are not correctly assigned, zervicepoint will not function correctly and a common first-setup issue are permissions and that orders get stuck.
Update SBNamespace ManageUsers
# This command should be run on the WF/SB server.
Import-Module ServiceBus
Set-SBNamespace -Name Zervicepoint -ManageUsers @('<domain>\<workflow manager account>','<domain>\<backend account>','<domain>\<frontend account>') -Verbose
Install Windows Features
Add-WindowsFeature -Name @(
'Net-Framework-45-Core',
'Web-Server',
'Web-Log-Libraries',
'Web-Request-Monitor',
'Web-Net-Ext45',
'Web-Windows-Auth',
'Web-Asp-Net45',
'Web-ISAPI-Ext',
'Web-ISAPI-Filter',
'Net-WCF-HTTP-Activation45',
'Web-Mgmt-Console'
)
Authentication
Depending on whether you will use Azure AD or ADFS for Zervicepoint.
AzureAD
To login with Azure AD we'll need to create a Azure Application in Azure. This can be done in either the azure web portal or by using their command line tools/APIs.
- Login to azure portal (https://portal.azure.com) and login with an administrative account that have create a azure application.
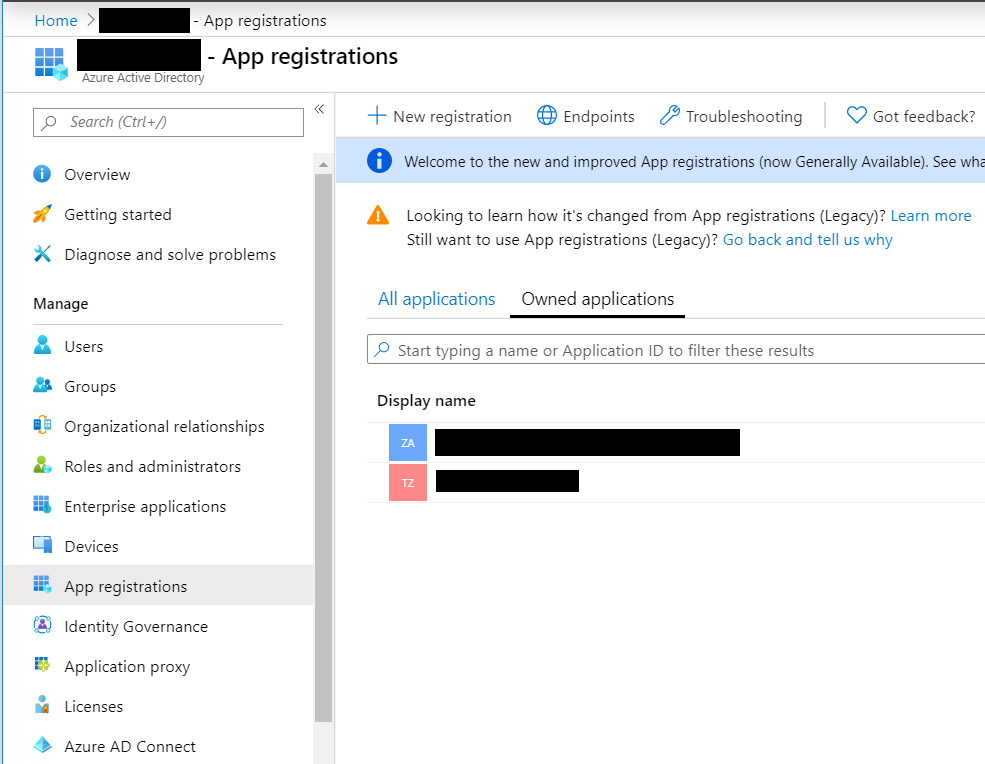
- https://portal.azure.com > Azure Active Directory > App Registrations
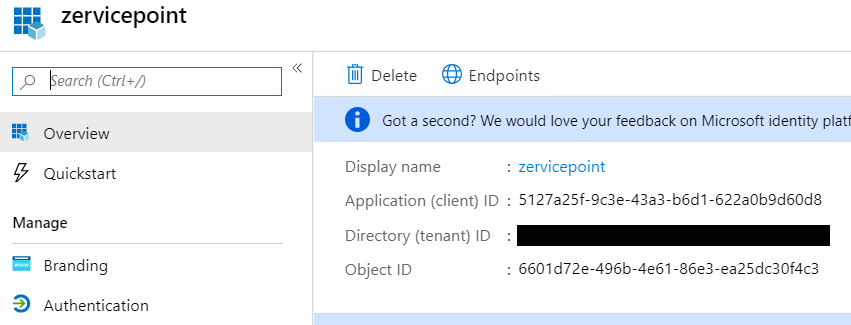
New Azure Application
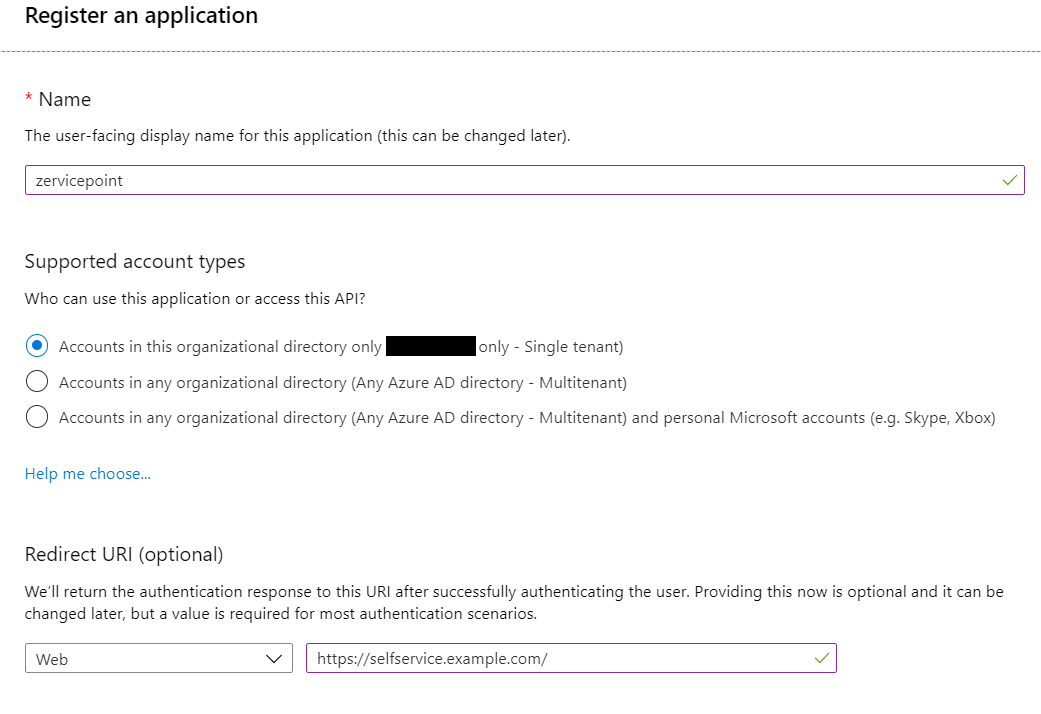
- Click New Registration to create a new azure application.
- Enter displayname (i.e zervicepoint).
- Enter Redirect URI. This should be matching the hostname of zervicepoint. (i.e https://selfservice.example.com).
- Click register.
ApplicationId and TenantId
- After registration, take note of the Tenant Id and Application Id as you will use them later in this guide.
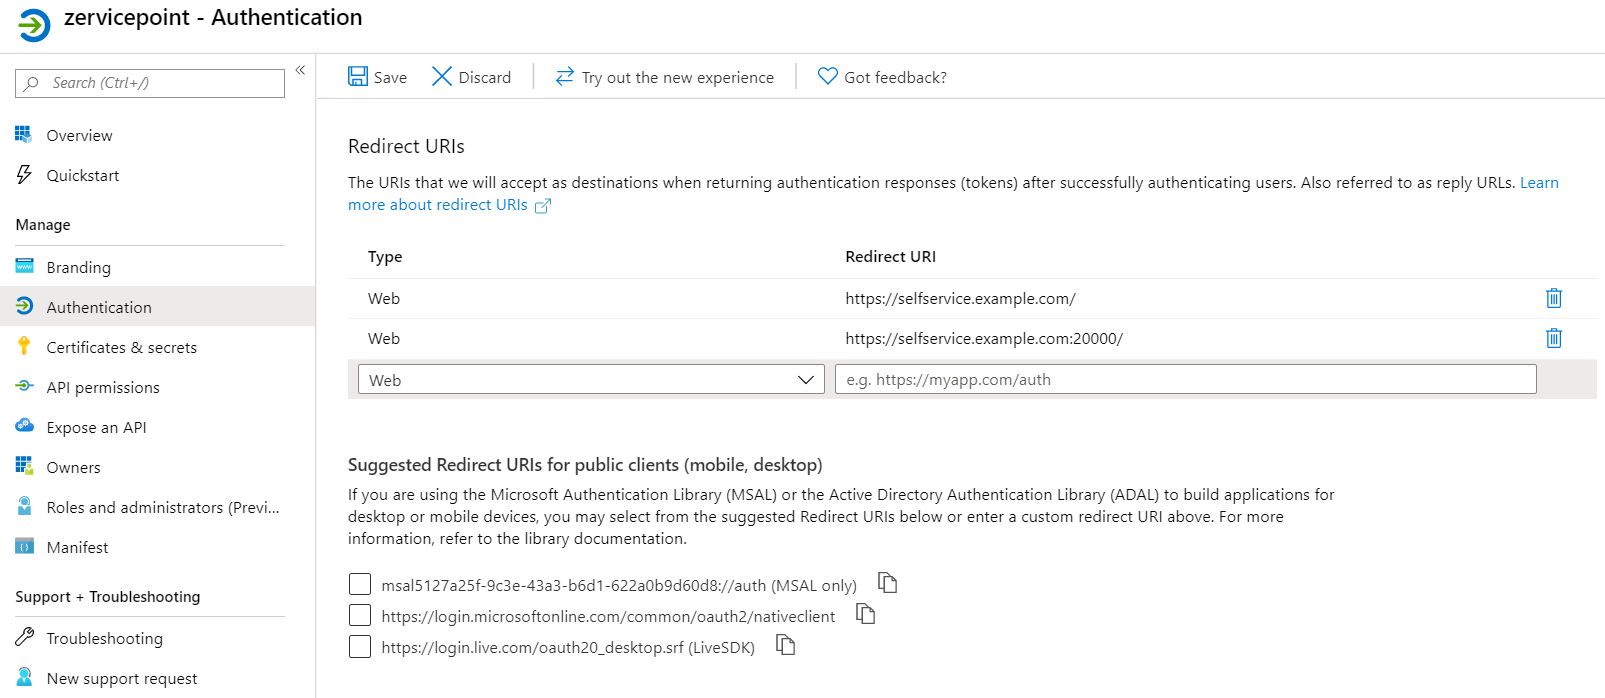
Update Redirect URIs
- Go to the Authentication page of the created application and add an additional Redirect URL.
| Type | RedirectURI |
|---|---|
| Web | https://selfservice.example.com/ |
| Web | https://selfservice.example.com:20000/ |
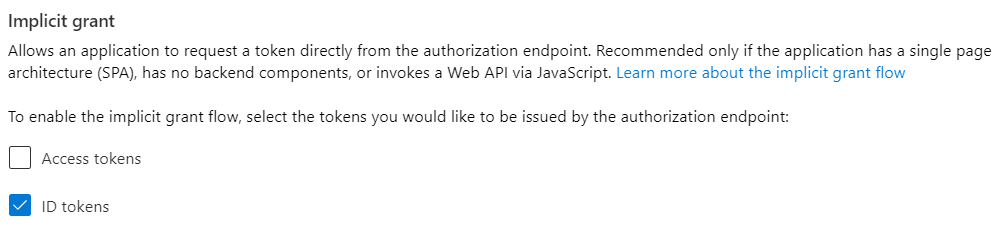
Update Implicit grant setting
- Go to the Authentication page and check the checkbox ID Tokens
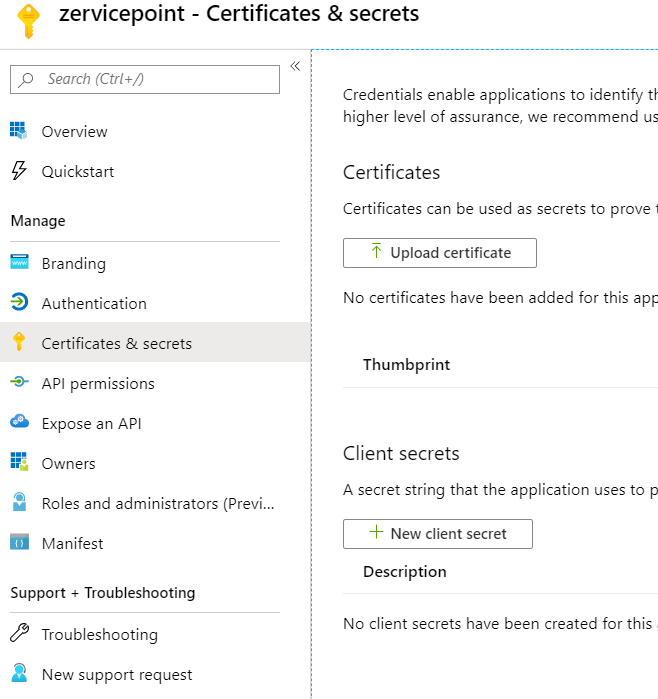
Generate Azure App Secret
- Go to the Certificates & Secrets page.
- Click New client secret.
- Choose how long this secret will be enabled and add a description. (i.e 'zervicepoint')
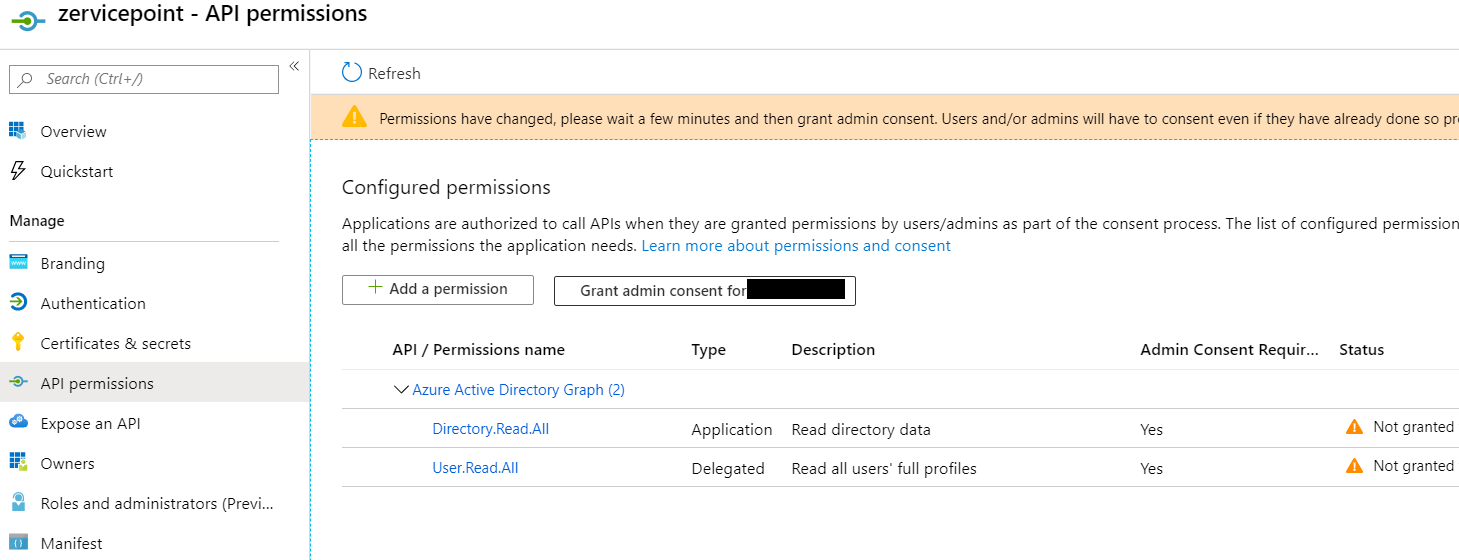
Azure Permissions
- Go to the API Permissions page.
- Click Add a permission > Select an API (Select Microsoft Graph)
- Click Delegated permissions > User.Read.All > Add Permission
- Click Add a permission > Select an API (Select Microsoft Graph)
- Click Application permissions > Directory.Read.All > Add Permission
- Click "Grant admin consent for organization name" in order to allow zervicepoint to read the necessary Azure AD info to login to Zervicepoint.
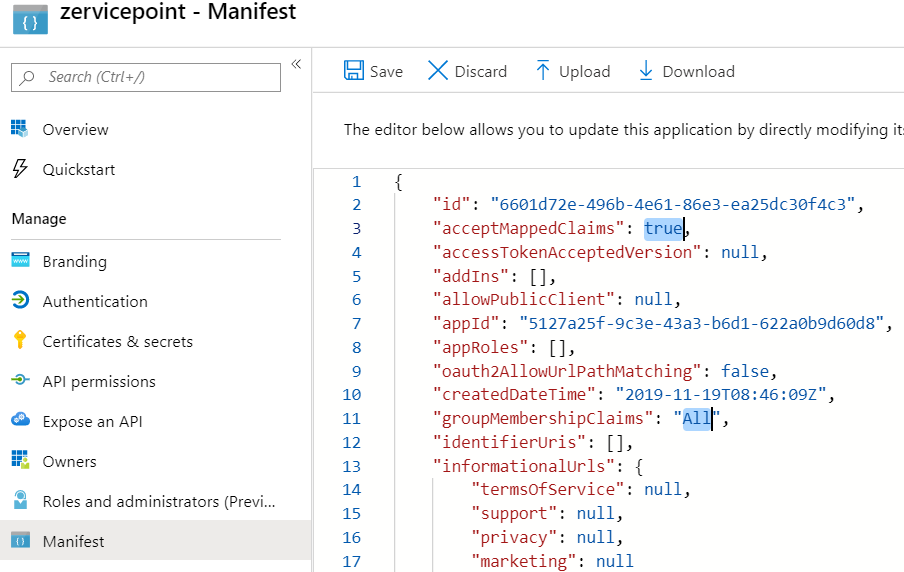
Update Manifest
Update the following two properties in the manifest.
| Property | Value |
|---|---|
| acceptMappedClaims | true |
| groupMemershipClaims | All |
- Click Manifest
- Update manifest. Ensure you don't make any typos.
- Click save.
ADFS
To configure Zervicepoint with ADFS, you’ll need some essential information and to establish a Relying Party Trust on your ADFS server.
We support two ways of configuring this setup, depending on whether your ADFS environment has a public metadata endpoint.
Required Information
To set up Zervicepoint with ADFS, collect the following details from your ADFS environment:
- ADFS Hostname (e.g.,
sts.example.com) - ADFS Thumbprint
Relying Party Trust in ADFS
To enable authentication through ADFS, you’ll need to create a Relying Party Trust.
Active Directory Federation Service should run atleast version 2.0 or later
Relying party trust
WS-Federation Passive Endpoint
Identifiers
Required Claims
Configure the following LDAP attributes as claims for the Relying Party Trust:
| Attribute | Claim |
|---|---|
| SAM-Account-Name | Name ID |
| E-mail-Addresses | |
| Display-Name | Name |
| Token-Groups | Group |
Creating an ADFS Relying Party Trust via PowerShell
For a quicker setup, you can use PowerShell to create the Relying Party Trust:
Note
Replace "selfservice.example.com" with your Zervicepoint hostname
# Must be run on ADFS Server
Import-Module ADFS

$Name = "Zervicepoint"
$Identifier = @(
    "https://selfservice.example.com/",
    "https://selfservice.example.com:20000",
    "https://selfservice.example.com:9900/ProcessSystem/"
)
$IssuanceTransformRule = '@RuleTemplate = "LdapClaims"
    @RuleName = "LDAP"
    c:[Type == "http://schemas.microsoft.com/ws/2008/06/identity/claims/windowsaccountname", Issuer =="AD AUTHORITY"]
        => issue(store = "Active Directory", types = ("http://schemas.xmlsoap.org/ws/2005/05/identity/claims/emailaddress", "http://schemas.xmlsoap.org/claims/CommonName",
        "http://schemas.xmlsoap.org/ws/2005/05/identity/claims/nameidentifier", "http://schemas.xmlsoap.org/ws/2005/05/identity/claims/name",
        "http://schemas.xmlsoap.org/claims/Group"), query = ";mail,displayName,sAMAccountName,displayName,tokenGroups;{0}", param = c.Value);'

$WSFedEndpoint = "https://selfservice.example.com"
$AdditionalWSFedEndpoint = "https://selfservice.example.com:20000"
$AccessControlPolicyName = "Permit everyone"

Add-AdfsRelyingPartyTrust -Name $Name -Identifier $Identifier -IssuanceTransformRules $IssuanceTransformRule -WSFedEndpoint $WSFedEndpoint -AdditionalWSFedEndpoint $AdditionalWSFedEndpoint  -AccessControlPolicyName $AccessControlPolicyName
Option 1: Standard Configuration (With Metadata Endpoint)
If your ADFS metadata endpoint is publicly accessible, prepare the following information for Zervicepoint:
- Issuer
- Metadata Endpoint
- Trusted Issuer
Option 2: Manual Configuration (Without Metadata Endpoint)
For environments without a public metadata endpoint, you can configure ADFS manually:
- Leave the Metadata Endpoint field blank in the Zervicepoint setup.
- Get the public Signing Certificate Key from your ADFS server.
- Upload the Signing Certificate Key to the Windows Certificate Store under
LocalMachine/My.
You will still need to provide the following information to Zervicepoint:
- Issuer
- Trusted Issuer
The trusted issuer must match the Thumbprint of the certificate used by ADFS.
Start ZervicePointSetup
Download zervicepoint media
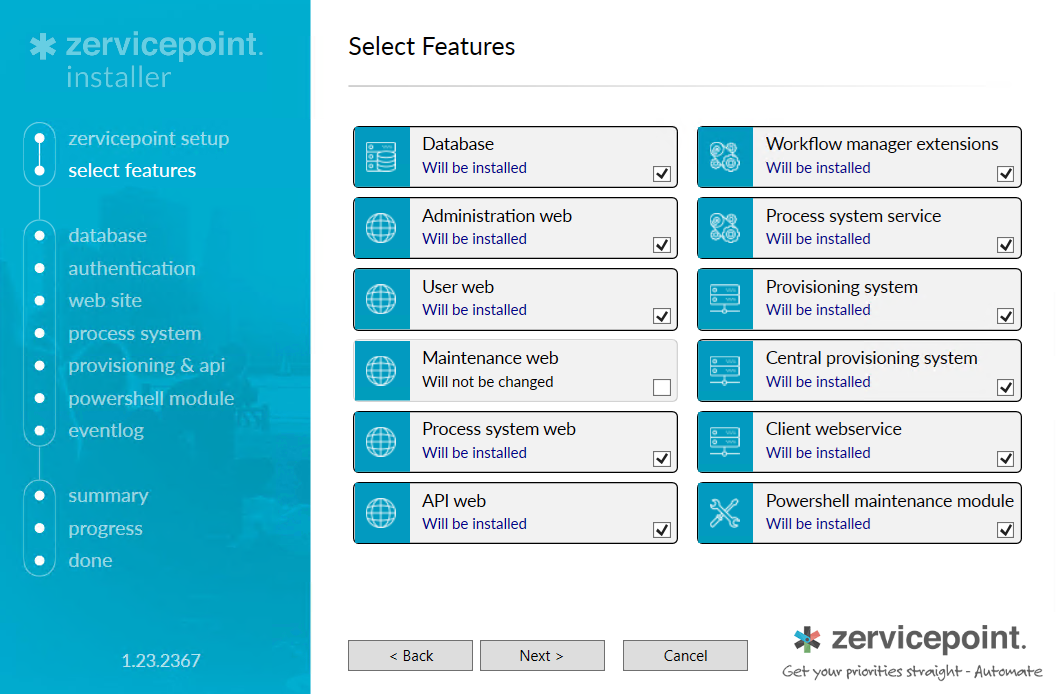
Features
Select and install the following features. The setup wizard will provide explanation on the settings to configure.
- Database
- Workflow Manager Extensions
- Administration Web
- Process system service
- User Web
- Provisioning System
- Process System Web
- Client Webservice
- API Web
- Powershell maintenance module
Database
Enter database settings for zervicepoint.
Authentication Settings
Select Azure or ADFS as Identity provider. depending on your choice earlier.
If you haven't created a Azure application for zervicepoint, check the following links
Register Azure Application for Zervicepoint
Web site settings
| Key | Value |
|---|---|
| Hostname | selfservice.example.com |
| Application Pool Account | domain\frontendaccount |
| Website certificate | selfservice.example.com |
| ServiceBus server | If WF/SB is installed on the same server as zervicepoint, use the FQDN of the server. |
process system
| Key | Value |
|---|---|
| Services account | domain\backendaccount |
| Workflow Manager hostname | If WF/SB is installed on the same server as zervicepoint, use the FQDN of the server. |
| ServiceBus server | If WF/SB is installed on the same server as zervicepoint, use the FQDN of the server. |
Provisioning and API
| Key | Value |
|---|---|
| Store | Store |
| Client webservice hostname | selfservice.example.com |
| Client webservice port | 8443 |
| Services account | domain\backendaccount |
| Worker authentication | Key |
| Credential name | ZervicepointProvisioning |
| API authentication | Key |
Powershell module
| Key | Value |
|---|---|
| API Url | https://selfservice.example.com:30000/Store |
Post-Configuration
Verify permissions
Ensure permissions are set for the service accounts.
Frontend account | Backend account | Workflow manager account
Tip
The community module dbatools is great for sql server administration. It can be used to easily validate that the permissions are set.
Restart ServiceBus and Workflow Manager
If the Service Bus Farm and Workflow Manager is running, ensure that both services are restarted before starting Zervicepoint
Note
It can take a few minutes for the services to stop/start sometimes. You must run with an account that is member of the WF/SB admin group and in a elevated powershell prompt.
Add AzureAppSecret to frontend account
Create a credential called AzureAppSecret as the frontend account. This can either be done via powershell or using "Windows Credentials" tool. The azure app secret is the secret that was created during registration of an app.
start-process powershell -Credential (Get-Credential -UserName "<domain>\<username>" -Message "Enter password for frontend account")
# In the new powershell window running in the context of the frontend account
Import-Module "C:\Program Files\Zipper\ZervicePoint\Powershell\ZervicePoint.WebApi.PowerShell"
Set-ZPKeyCredential -Name "AzureAppSecret" -Key "<azure app secret>"
Run powershell as a different user
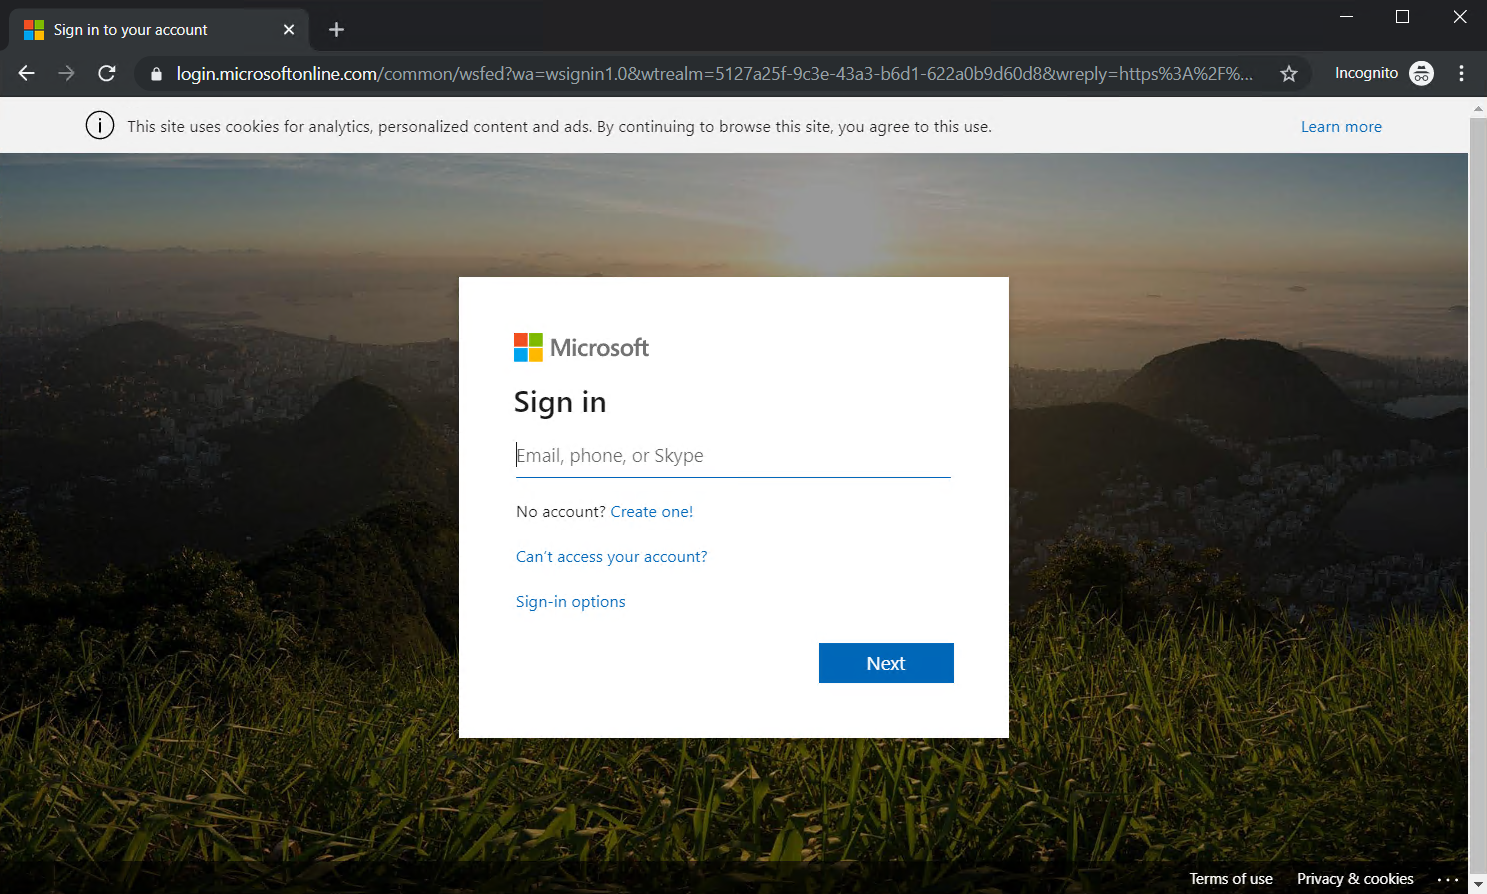
Login to zervicepoint
Login to zervicepoint portal.(e.g 'https://selfservice.example.com/')
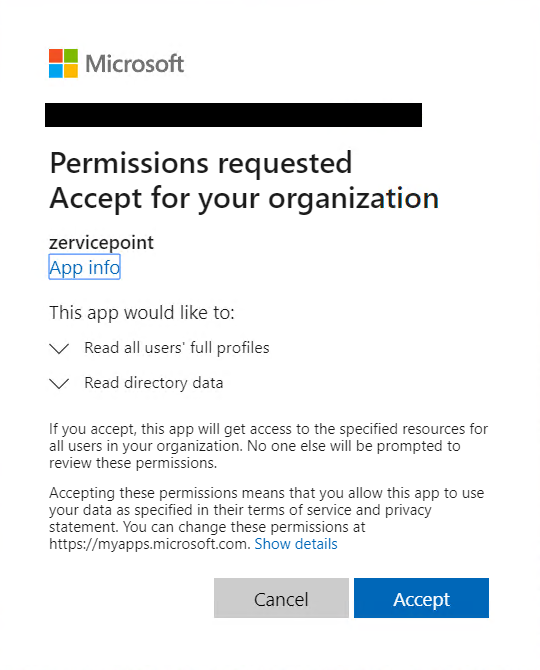
During the first login to zervicepoint using Azure AD, it may take a minute or so before you're redirected to the Azure login page. If the azure application has not yet been granted consent. You will be prompted to grant it.
Important
The account logging in for the first time should be a global administrator of the azure tenant used as tenant id. You will not be prompted for this again unless the azure application permissions are modified.
Accept permission request
If you've logged in with a global administrator account, you'll see the following prompt.
Common issues
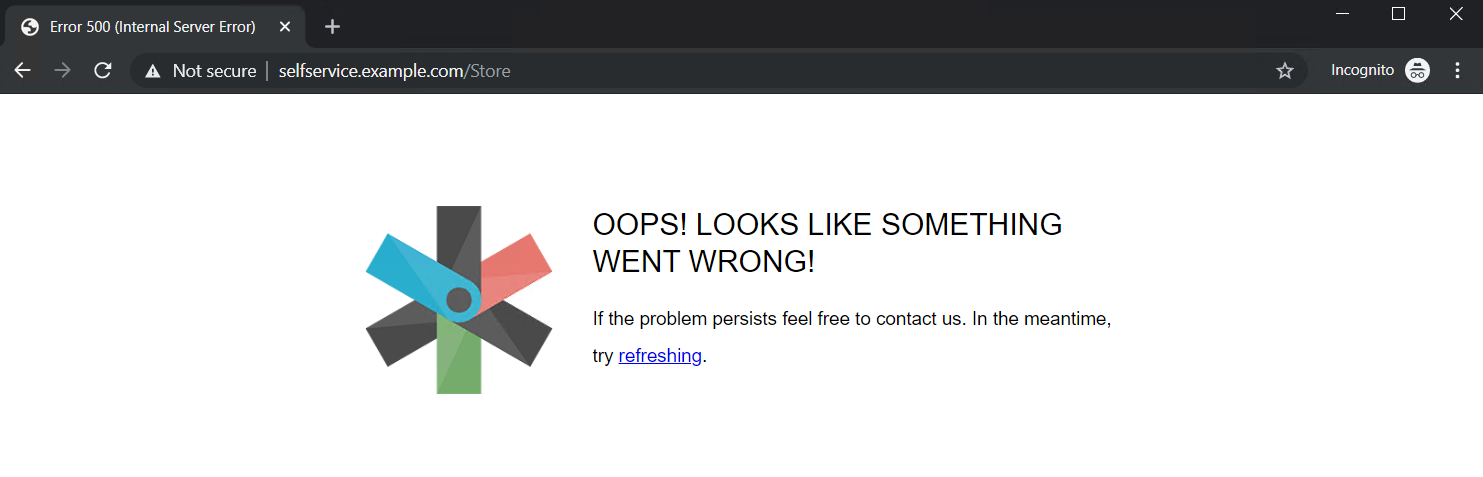
Oops something went wrong
If you login to zervicepoint portal the first time after creating a azure app. If you login with an account that does not have global administrator permissions in the tenant or application administrator. You may see a 'something went wrong' error.
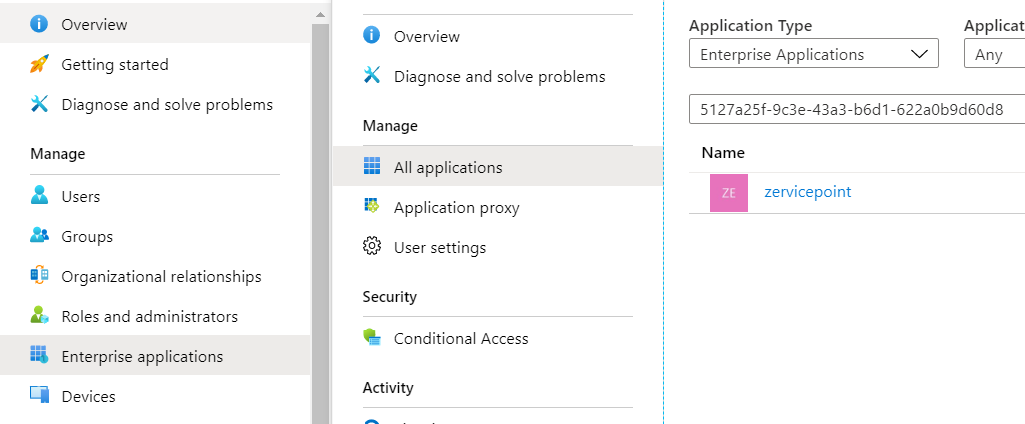
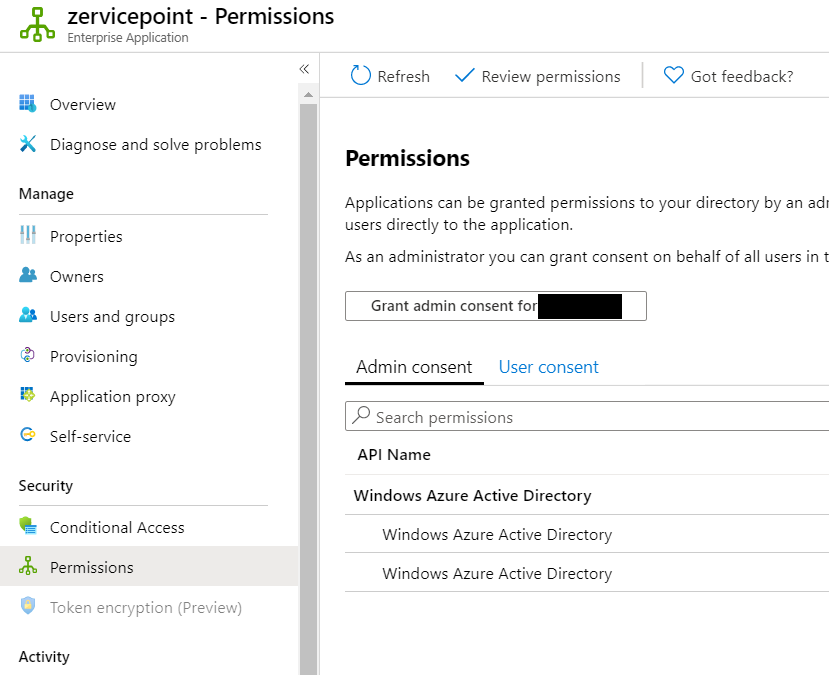
- Go to the azure portal > Azure Active Directory > Enterprise applications > search for application using displayname or appid
- Go to Permissions page and click 'Grant admin consent for organization'
Configure ProvisioningSystem service
After we've verified that we can logon to the zervicepoint portal, login with the account that has a email address that matches the storeadministrator email used during the install.
Go to admin page > Edit Store > Worker Authentication
- Generate a WorkerKey - Save this key as it will be used in a later step
- Generate a token signing certificate - use the same certificate for both token and data signing. Save the thumbprint as it will be used in a later step.
- Click save.
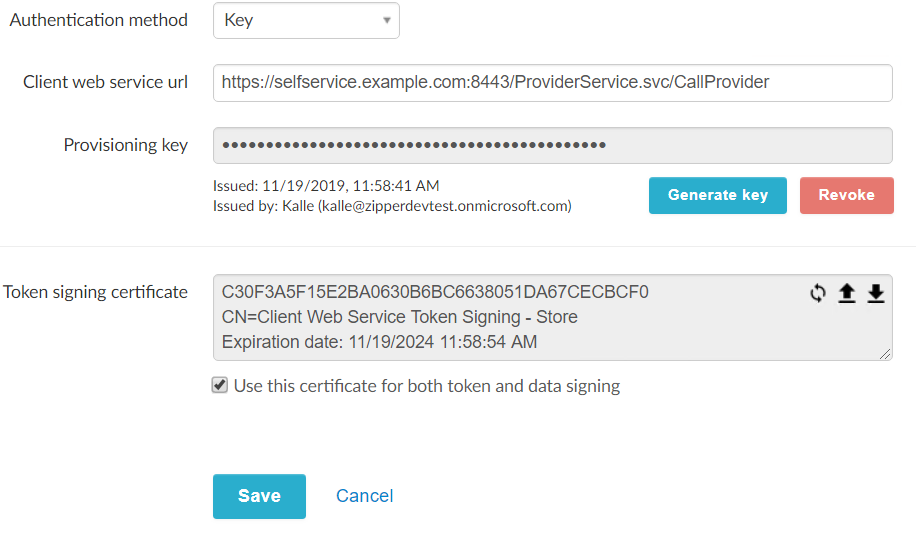
Update ClientWebService config with generated certificate thumbprint
Update the TokenCertThumbPrint and DataSignCertThumbPrint keys with the generated certificate.
 <appSettings>
  <add key="TokenCertThumbPrint" value="C30F3A5F15E2BA0630B6BC6638051DA67CECBCF0"/>
  <add key="TokenCertFile" value=""/>
  <add key="DataSignCertThumbPrint" value="C30F3A5F15E2BA0630B6BC6638051DA67CECBCF0"/>
  <add key="TokenAudience" value="whiteowlwebservice"/>
  <add key="providerSettings" value="C:\Program Files\Zipper\ZervicePoint\ClientWebService\providers.xml"/>
  <add key="providerPath" value="C:\Program Files\Zipper\ZervicePoint\Web\ClientWebService\"/>
 </appSettings>
# Restart the website
Get-Website -Name "ZervicePoint ClientWebService" | Stop-Website
Get-Website -Name "ZervicePoint ClientWebService" | Start-Website
Update ProvisioningKey
start-process powershell -Credential (Get-Credential -UserName "<domain>\<username>" -Message "Enter password for backend account")
# In the new powershell window running in the context of the backend account
Import-Module "C:\Program Files\Zipper\ZervicePoint\Powershell\ZervicePoint.WebApi.PowerShell"
Set-ZPKeyCredential -Name "WorkerKey" -Key "<worker key>"
Create a test activity and data source
You should complete the following in order to create a sample data source and activity that can be found by the inventory.
Restart Provisioning System
- The provider Get-DayOfWeek should now be listed in Admin Page > Providers
- The data source DropDown.GetDays should now be listed in Admin Page > Data sources
Start Zervicepoint Process System
Now we're ready to start the processsystem service.
Note
You could start all zervicepoint services, but note that provisioningsystem and provisioningsysteminventory may generate errors as they have not been configured yet in the administration portal.
Create test service
You should create a test service which will use the data source and activity and verify the following.
- You can receive data from a dynamic dropdown using the DropDown.GetDays activity
- You can receive todays day from the activity Get-DayOfWeek by adding the activity and a state activity bound to variable DayOfWeek