Setup Microsoft ServiceBus / Workflow Manager
High-Level steps for installing Service Bus / Workflow Manager
- Create Service Account (Recommended)
- Create Admin Group (Optional)
- Download / Install binaries from media
- Run Workflow Manager Configuration Wizard
Before you begin
This guide assume you install Service Bus/Workflow Manager on Windows Server 2016 or newer.
- MS SQL Server installed and accessible.
- The account running the wizard should have approprate access to the SQL Server to create databases and configure user logins.
- The account running the wizard should have local admin rights to server.
- You must update values appropriate to your environment.
Create Service Account
A service account is necessary for running the Service Bus / Workflow Manager services.
Import-Module ActiveDirectory
New-ADUser -Name '<username>' -SamAccountName '<username>' -Description "Workflow Manager Service Account" -PasswordNeverExpires:$true -AccountPassword (ConvertTo-SecureString -String "Passw0rd1" -AsPlainText -Force) -Enabled:$true
Create Admin Group (Optional)
You can either use the BUILTIN\Administrators group or create a new AD group for being granted database access to the workflow manager/service bus databases.
Import-Module ActiveDirectory
New-ADGroup -Name '<groupname>' -Description "ServiceBus/Workflow Manager Admins" -GroupScope Global -GroupCategory Security
Download Service Bus / Workflow Manager
Install Service Bus / Workflow Manager binaries
Step 1
Install the required Windows Features
Add-WindowsFeature -Name @(
    'NET-Framework-Features',
    'NET-Framework-Core',
    'Net-Framework-45-Core',
    'Web-Server',
    'Web-Log-Libraries',
    'Web-Request-Monitor',
    'Web-Net-Ext45',
    'Web-Windows-Auth',
    'Web-Asp-Net45',
    'Web-ISAPI-Ext',
    'Web-ISAPI-Filter',
    'Net-WCF-HTTP-Activation45',
    'Web-Mgmt-Console'
)
Step 2
Use Web Platform Installer to extract the files
# WorkflowManagerRefresh
& 'C:\Program Files\Microsoft\Web Platform Installer\WebpiCmd.exe' /offline /products:WorkflowManagerRefresh /path:C:\Media\WorkflowManagerRefresh

# ServiceBus_1_1_TLS_1_2
& 'C:\Program Files\Microsoft\Web Platform Installer\WebpiCmd.exe' /offline /products:ServiceBus_1_1_TLS_1_2 /path:C:\Media\ServiceBus_1_1_TLS_1_2

# WorkflowCU5
& 'C:\Program Files\Microsoft\Web Platform Installer\WebpiCmd.exe' /offline /products:WorkflowCU5 /path:C:\Media\WorkflowCU5
Step 3
Install WorkflowManagerRefresh and WorkflowCU5
# WorkflowManagerRefresh
cd C:\Media\WorkflowManagerRefresh\bin\
.\WebpiCmd.exe /Install /products:"WorkflowManagerRefresh" /XML:C:\Media\WorkflowManagerRefresh\feeds\v001\webproductlist.xml /AcceptEula /SuppressPostFinish

# WorkflowCU5
cd C:\Media\WorkflowCU5\bin
.\WebpiCmd.exe /Install /products:"WorkflowCU5" /XML:C:\Media\WorkflowCU5\feeds\v001\webproductlist.xml /AcceptEula /SuppressPostFinish
Step 4
Uninstall the following programs:
- Windows Fabric 1.0.976.0
- Service Bus 1.1 2.0.30904.0
Delete the following folder if it exists:
- C:\Program Files\Service Bus
Step 5
Install the updated Service Bus Version
CD C:\Media\ServiceBus_1_1_TLS_1_2\bin
.\WebpiCmd.exe /Install /products:"ServiceBus_1_1_TLS_1_2" /XML:C:\Media\ServiceBus_1_1_TLS_1_2\feeds\v001\webproductlist.xml /AcceptEula /SuppressPostFinish
Step 6
Uninstall the following program:
- Microsoft Azure Service Fabric 5.1.163.9590
Step 7
Install Service Fabric
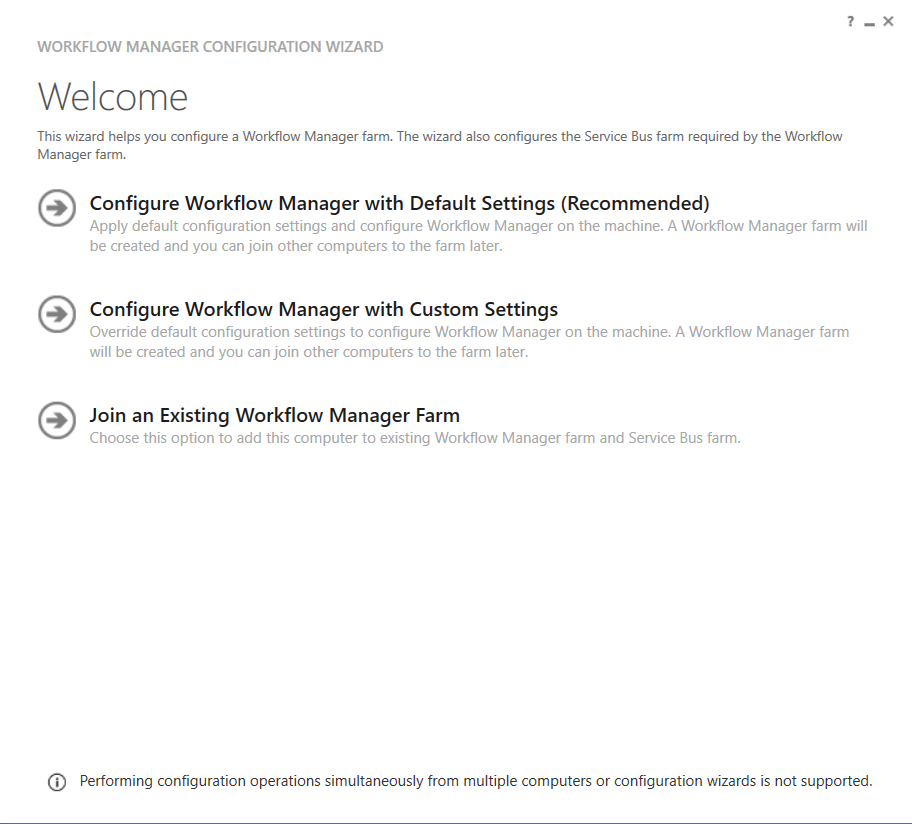
Workflow Manager Configuration Wizard
Select Configure Workflow Manager with Custom Settings
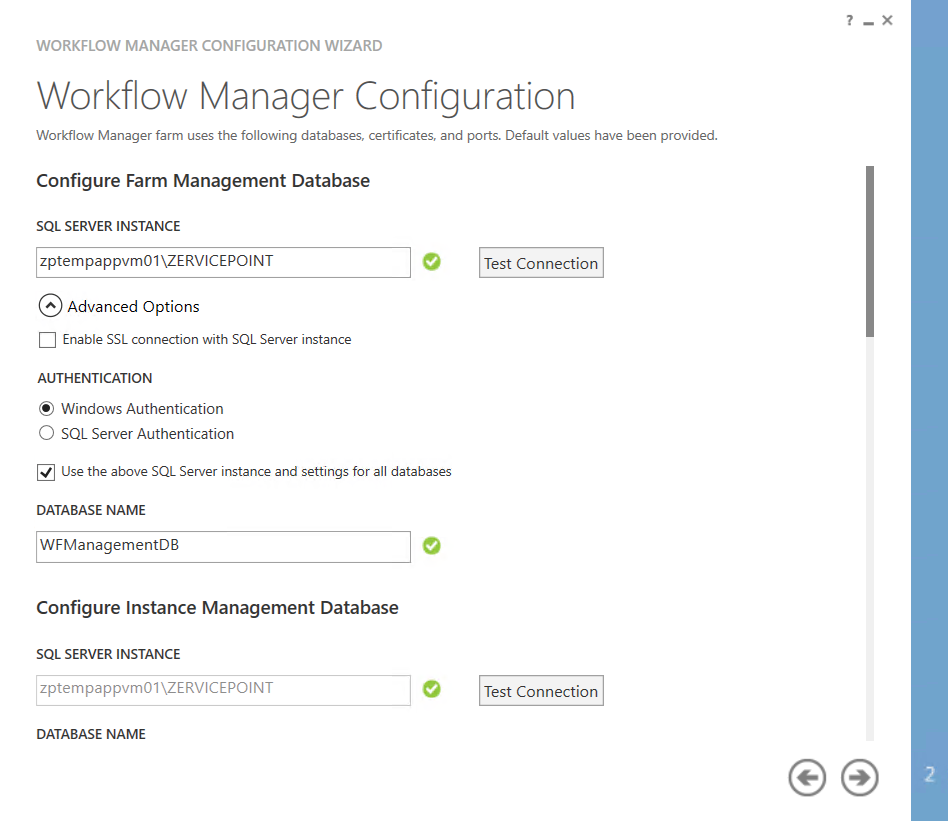
Select SQL Server Instance
Enter SQL Server instance details. Optionally you can change database names of the workflow manager databases. We recommend adding a prefix "DEV" or "TEST" for test environments.
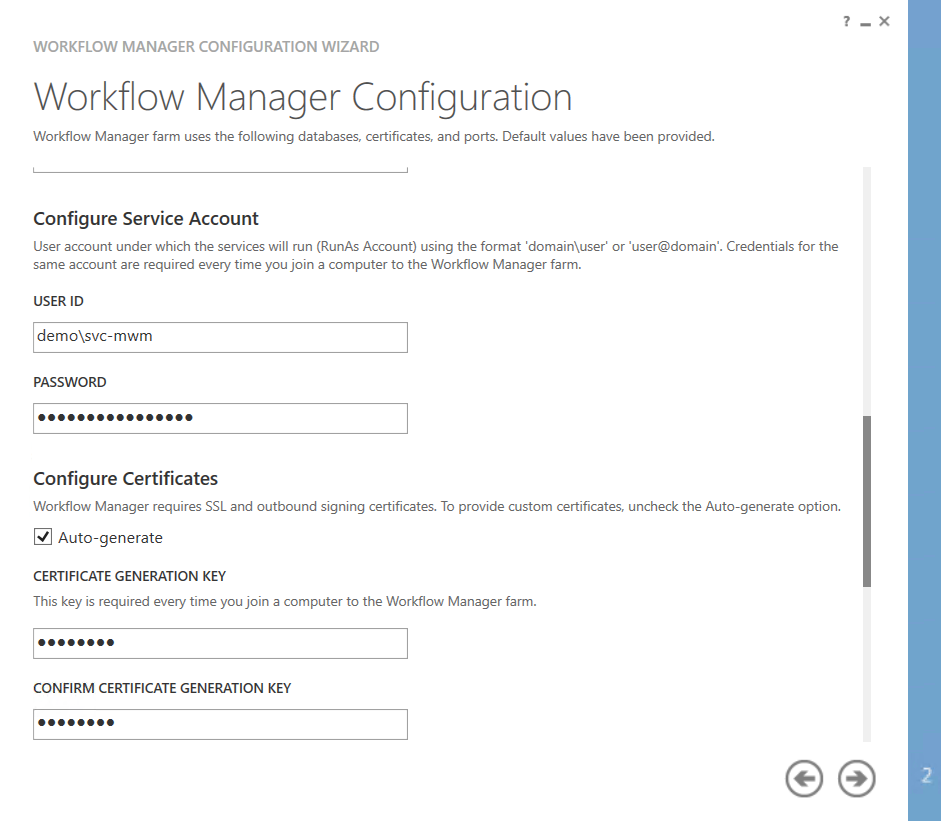
Enter Service Account details / Generate certificate
- Enter the service account details of the service account to use for running the service bus/workflow manager services.
- Enter a certificate generation key.
Note
You must use the same key if you join an additional node to the service bus farm. We recommend saving this key in a secure location.
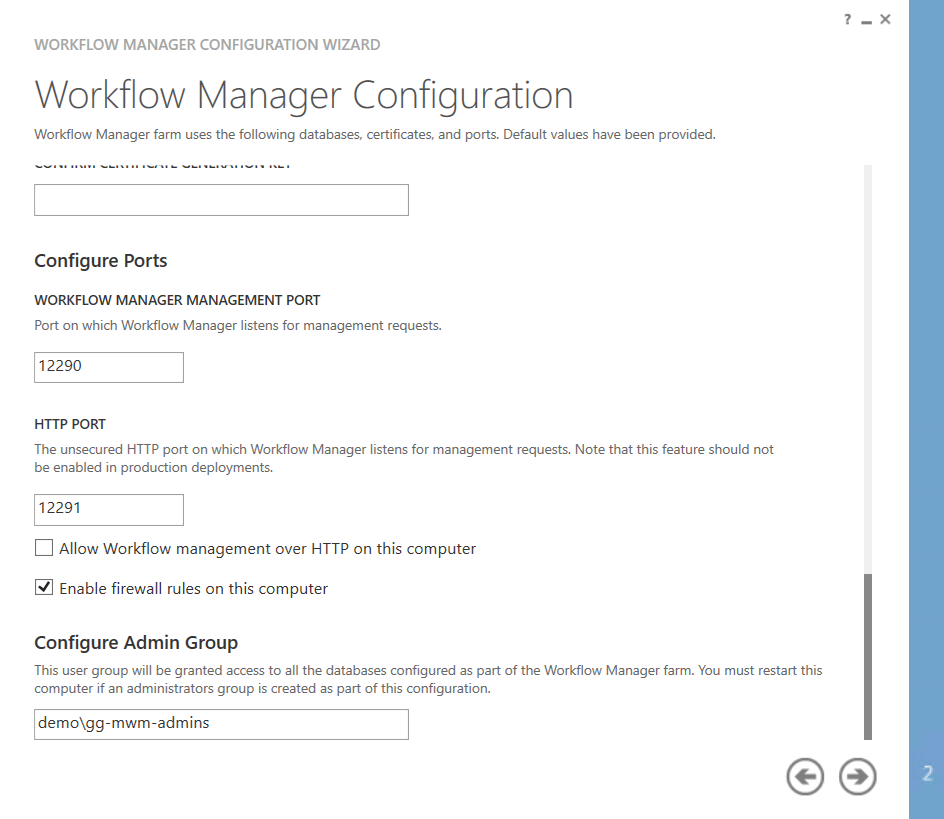
Configure Admin Group
- Enter AD group details. Use either default BUILTIN\Administrators or create your own AD Group
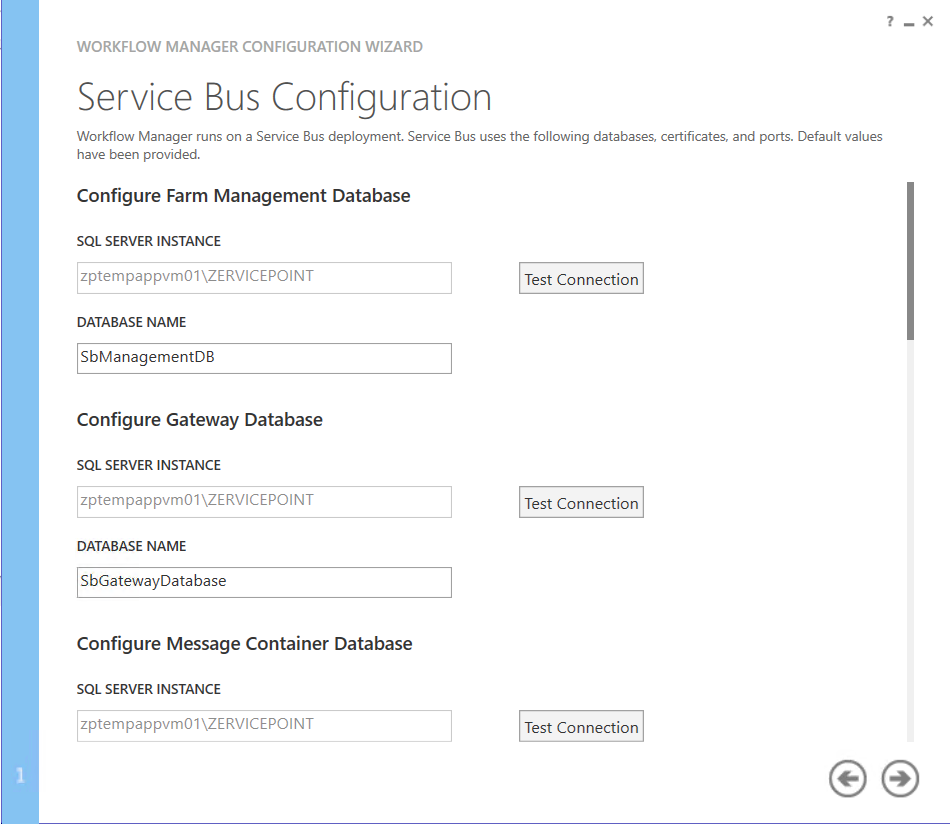
Service Bus Configuration
Now that we've configured the details for the workflow manager farm, we continue with configuring the service bus.
Select SQL Server Instance
Enter SQL Server instance details. Optionally you can change database names of the service bus databases. We recommend adding a prefix "DEV" or "TEST" for test environments.
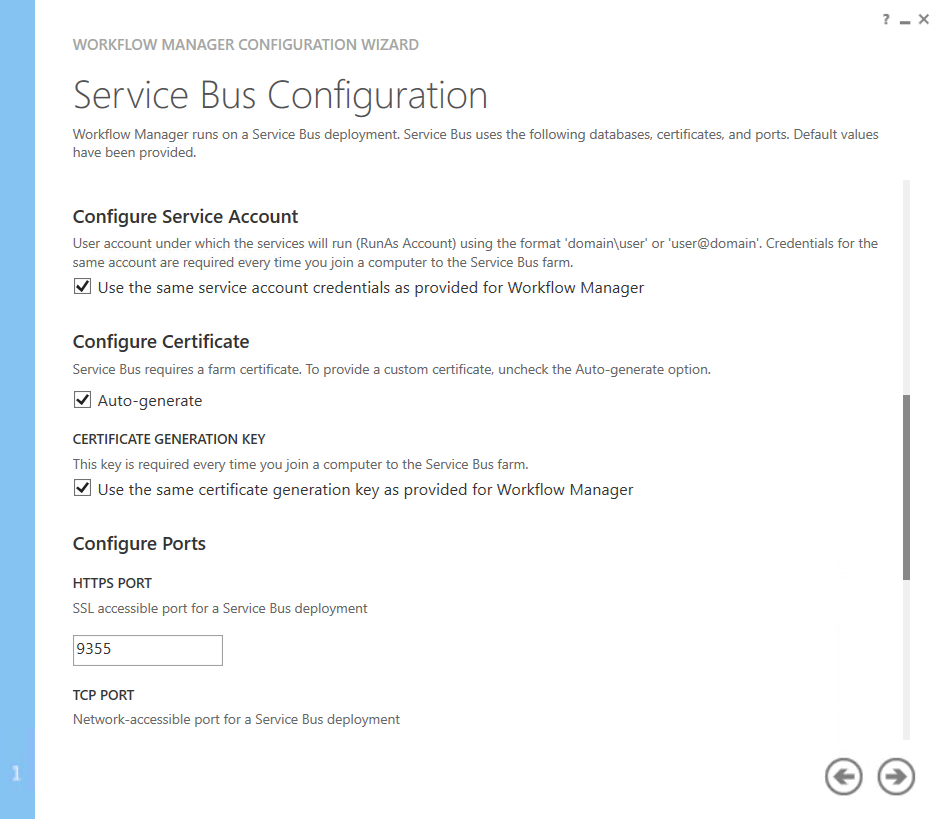
Enter Service Account details / Generate certificate
We recommend you use the same service account / certificate generation key
Configure Admin Group
- Enter AD group details. Use either default BUILTIN\Administrators or create your own AD Group

Summary
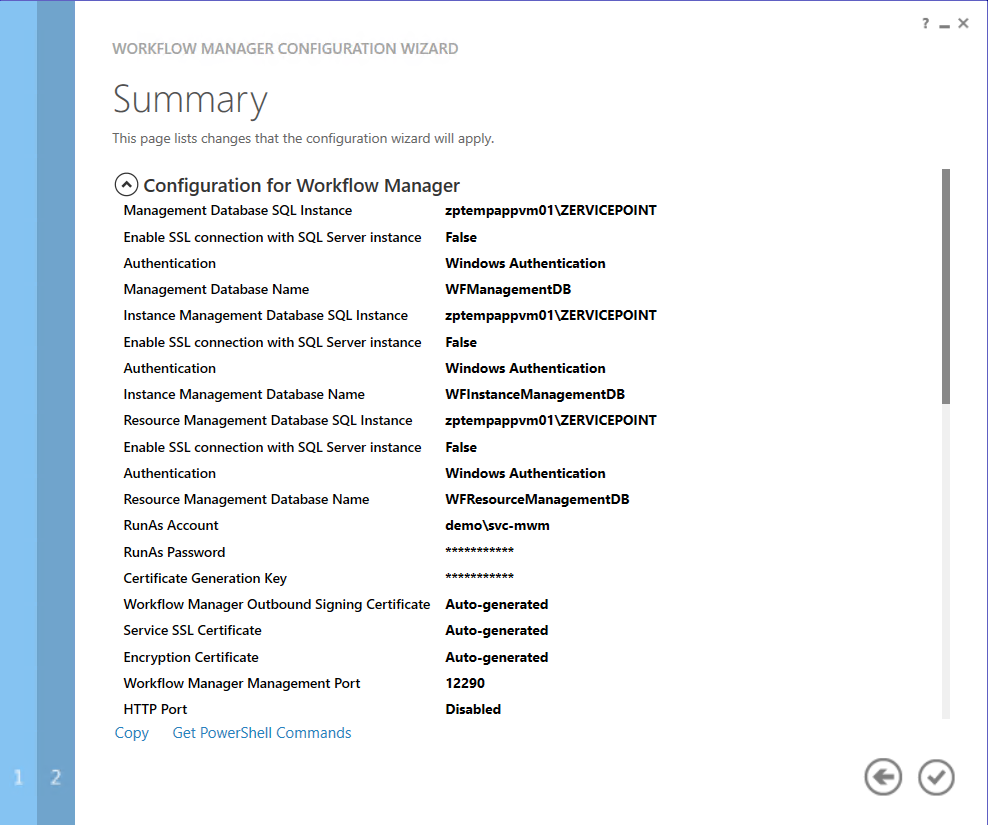
Review or save the setup details for documentation purposes and then click the install button.
After the installation the following databases should've been created.
- WFManagementDB
- WFInstanceManagementDB
- WFResourceManagementDB
- SBManagemenDB
- SBGatewayDatabase
- SBMessageContainer01
You can verify the installation status of ServiceBus/Workflow Manager with the Get-WFFarmStatus and Get-SBFarmStatus cmdlets.
Tip
If you get the error "KeySet does not exist" - make sure you run powershell with elevated rights and that you are member of the worflow manager admin group.
PS C:\> Get-WFFarmStatus

HostName                              ServiceName             ServiceStatus
--------                              -----------             -------------
zptempappvm01.demo.zervicepoint.local WorkflowServiceBackend        Running
zptempappvm01.demo.zervicepoint.local WorkflowServiceFrontEnd       Running

PS C:\> Get-SBFarmStatus

HostId HostName                              ServiceName                   Status
------ --------                              -----------                   ------
1      zptempappvm01.demo.zervicepoint.local Service Bus Gateway           Running
1      zptempappvm01.demo.zervicepoint.local Service Bus Message Broker    Running
1      zptempappvm01.demo.zervicepoint.local Service Bus Resource Provider Running
1      zptempappvm01.demo.zervicepoint.local Service Bus VSS               Running
1      zptempappvm01.demo.zervicepoint.local FabricHostSvc                 Running
Note
You can run the following commands to see what cmdlets are available for managing the service bus / workflow manager service.
Create Namespace for zervicepoint
After the ServiceBus / Workflow Manager is deployed - we must create a namespace for Zervicepoint to use.
The namespace should be called Zervicepoint and the following accounts should be added as "ManageUsers".
- Service account running workflow manager/service bus
- Service account running ProcessSystemWeb (Typically the frontend account)
- Service account running ProcessSystem (Typically the backend account)
New-SBNamespace -Name ZervicePoint -ManageUsers @("demo\svc-mwm","demo\svc-zp-backend","demo\svc-zp-frontend") -Verbose
Force .NET to use TLS 1.2
Set-ItemProperty -Path 'HKLM:\SOFTWARE\Wow6432Node\Microsoft\.NetFramework\v4.0.30319' -Name 'SchUseStrongCrypto' -Value '1' -Type DWord

Set-ItemProperty -Path 'HKLM:\SOFTWARE\Microsoft\.NetFramework\v4.0.30319' -Name 'SchUseStrongCrypto' -Value '1' -Type DWord
Restart Computer